

News
I’m very happy to announce that a new, much more affordable option for international shipping is now available in my shop.
Read more about the Delivengo option on the blog!
Also, do not miss the round-ups of the entries in the 2018 Advent Calendar – lots of inspiration and creativity!
Mosaic crochet 1
What is mosaic crochet? The question is simple enough, but the answer is not always clear!
If you search the Internet for “
I have myself contributed to the confusion: in January 2010, I wrote an article about mosaic crochet. My explanation of mosaic crochet ten years ago was rather similar to what I’m going to discuss today, but not exactly the same, and not comprehensive.
So let’s start with a definition!
I now define “mosaic crochet” as a crochet technique in which:
- The base fabric is built with sc’s, worked in stripes.
- The colour pattern is achieved by working dc’s, inserting the hook in a row/round below the current one.
That’s simple enough – but there are a lot of variations, and at least two main basic techniques.
The first technique is most often worked flat in two-row stripes. It uses standard sc’s combined with chains at specific places (you will find the detailed explanation below) and dc’s worked around the chains into a sc in the third row below.
Here are two designs worked in this technique:
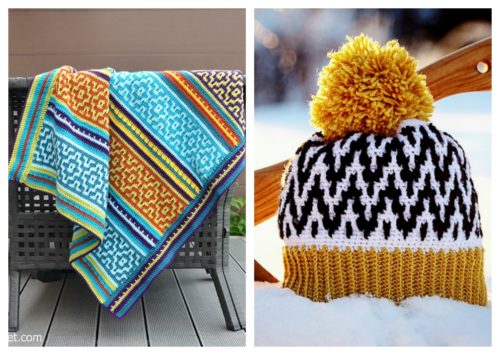
To the left, the Nya Mosaic blanket designed by Lilla Björn/Tatsiana Kupryianchyk. To the right, the Up Early – Up North hat designed by Martin Up North.
(Photo copyrights belong to the respective designers).
The hat is worked in the round, but to simplify, I will call this technique “mosaic crochet worked flat” – because it is most often done that way.
The second technique is most often worked in the round, either to form a tube or to create a flat motif. In this case, the stripes are generally worked over a single row, and the base fabric is made from
Here are two examples of designs using this second technique:
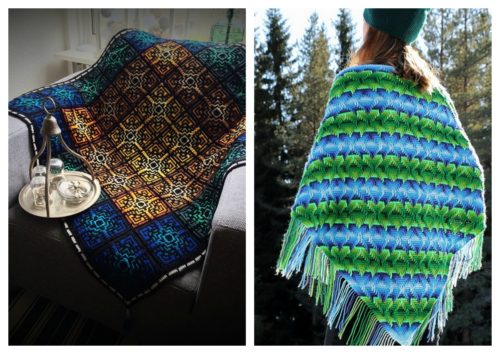
To the left, the Medina Mosaic Tiles designed by Mark Roseboom.
To the right, the Nomad by Fate shawl by Martin Up North (again!).
(Photos by the designers.)
The shawl is worked flat, but the yarn is fastened off at the end of each row – the fringe is a beautiful way to handle the ends without having to weave them in. Even if there are exceptions, I will simplify and call this technique “mosaic crochet in the round.”
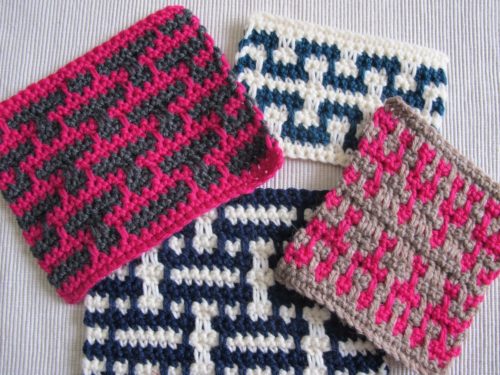
These two techniques can be combined, as in the splendid blanket Havana by Tinna Thorudottir Thorvaldar.
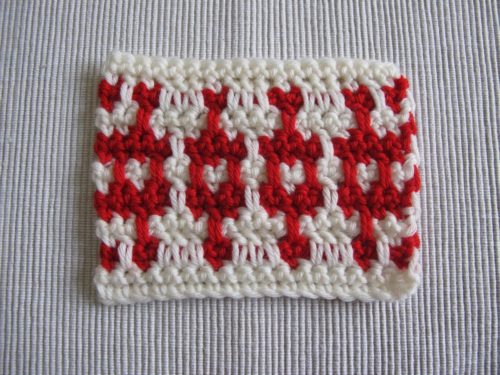
To start our explorations, we will concentrate on the first technique, mosaic crochet worked flat.
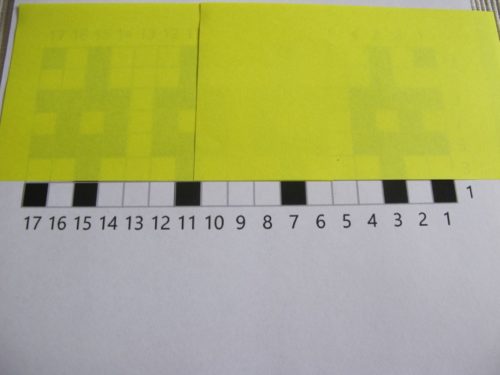
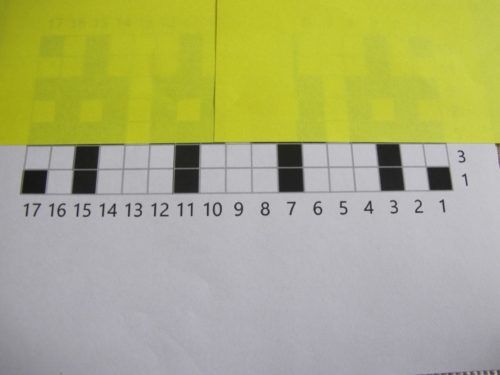
I think we now need to stop talking and start crocheting, using this chart:
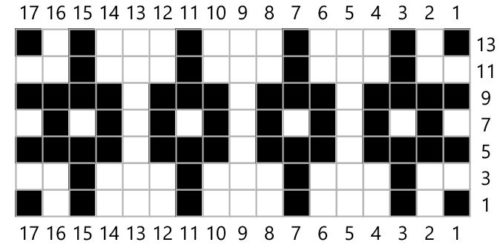
There are a few things to note about the chart:
The row numbers to the right of the chart are all odd numbers. This means that only right side rows are shown.
The first stitch in every row shown (stitch number 1 in the chart) indicates the colour used to work each stripe. Here, rows 1 and 2 are to be worked in black, rows 3 and 4 in white, rows 5 and 6 in black, and so on.
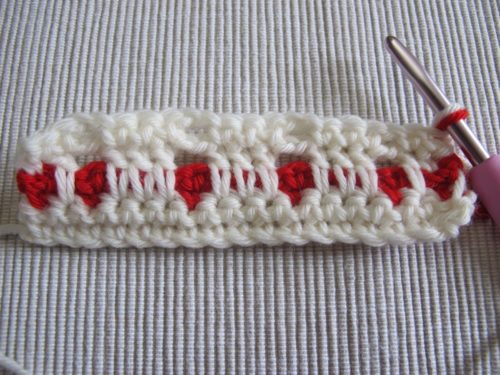
To make my swatch, I chose
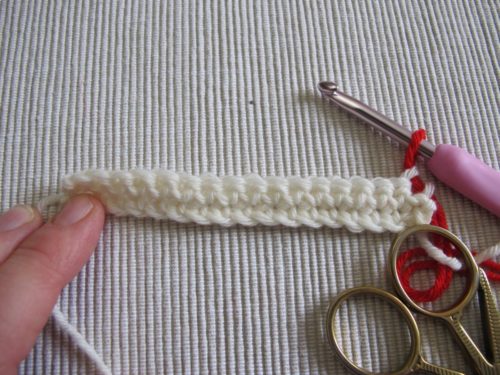
To begin, I worked two rows (not shown on the chart) in sc in the main colour (cream):
Ch 17 + 1 = 18.
Row 1: 1 sc in second ch from hook, 1 sc in each ch to end of row. There
Row 2: Ch 1 (do not count as
Note:
For neat colour changes, see my newsletter for January 2018. To carry the unused yarn along the selvedge, I used the method described for stripes in sc in the April 2018 newsletter.
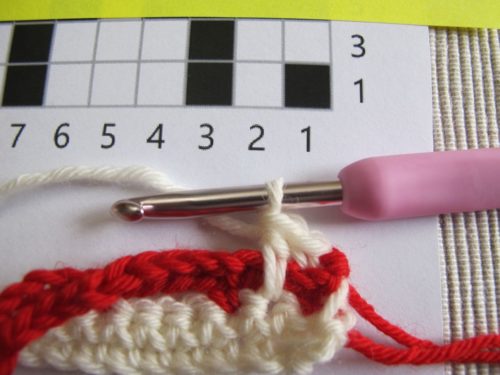
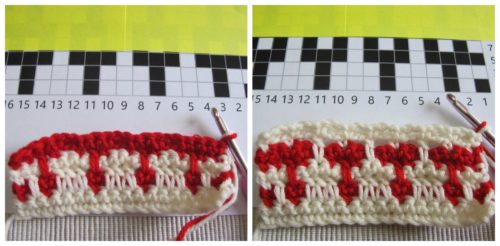
In order not to get lost in the chart, I placed Post-it notes above the current row.
And let’s not forget that 1 row in the chart = 2 rows to crochet = 1 stripe.
The colour of the stripe is indicated by the selvedge stitches, the first and last stitch in the row. Here, it’s the contrast colour (black square). So to work the first row in my chart, I will use the contrast colour – it’s the active colour in the first stripe.
For the first stitch, it’s easy. It’s a black square, so we work 1 sc in the first stitch. But the second square is white. This means we are not going to work it with the active colour. Instead, we chain 2 and skip 1 stitch in the previous row. Next, we work stitch number 3 (black square).
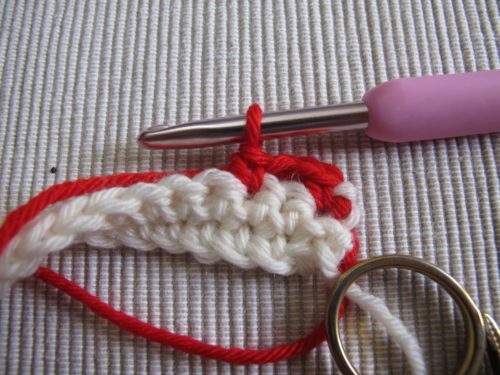
Next up are 3 white squares = 3 stitches to be skipped. Ch 4, skip 3 sts, 1 sc in next st
To make sure that the chain arches don’t pull in the work, we chain 2 for the first stitch to be skipped and add 1 ch for each additional stitch.
- 1 st to skip = ch 2
- 2 sts to skip = ch 3
- 3 sts to skip = ch 4
- 4 sts to skip = ch 5
Of course, if you find that your chain arches are too short or too long, you need to adapt the number of chains used.
We continue along the row. Each black square is
Turn, ch 1 (do not count as

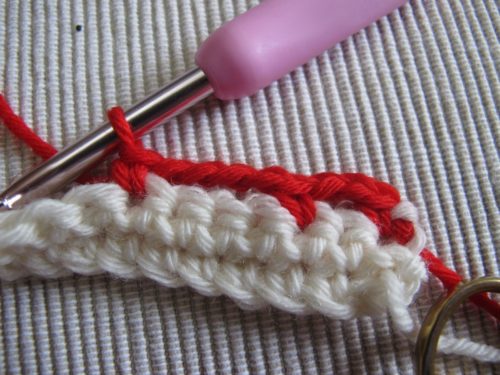
Before starting row 3, I move up my Post-its on the chart. When I work row 3, I need to carefully watch this row and the row below.
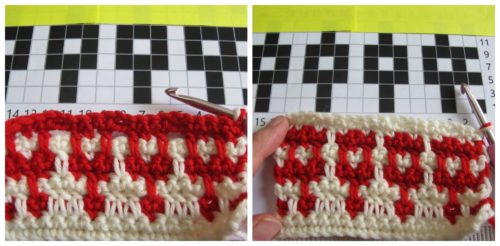
The first square in row 3 is white. It’s the main colour, in my case cream. For rows 3 and 4, the main colour is the active colour.
The first square is a white square on top of a black one – 1 sc with the active colour. The next square is white, too, but it’s sitting on top of another white square. This is a stitch that was skipped in the previous row. I need to make a dc, inserting my hook in the stitch three rows below, to fill this space.
The dc is worked around the chain arches in the two previous rows.
The next square is black. We do not work this stitch, but instead ch 2 and skip it.
We then have 3 white squares on top of white squares = 3 dc in the third row below.
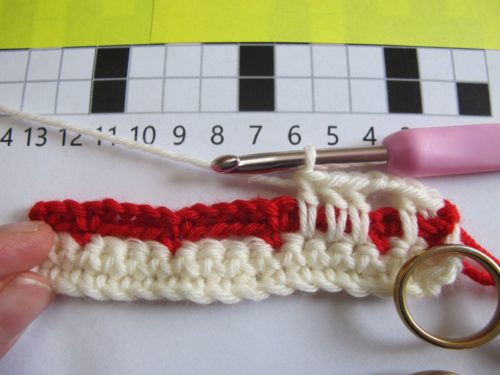
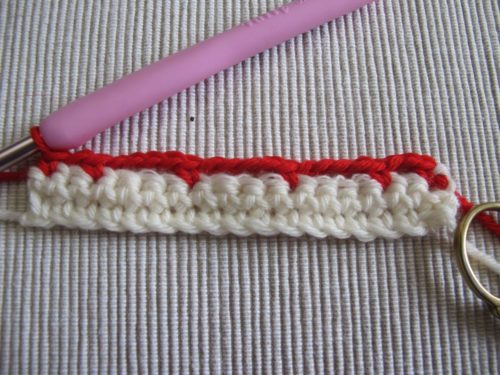
Continue along the row, using the same method.
The squares in the active colour are worked as sc’s if they sit on top of a square in the other colour, and worked as dc’s in the stitches three rows below if they sit on top of a square in the same colour.
You can imagine the row this way:
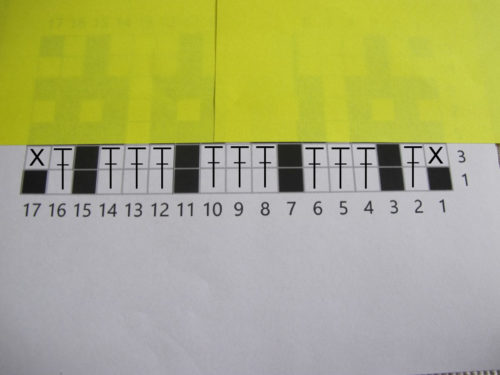
Tips:
– Chain arches in the 2 previous rows indicate that you need to work dc’s – for the other stitches, you need to check the chart!
– Dc’s are always worked by inserting the hook in
Turn, ch 1 and work the next row making 1 sc in each stitch (sc or dc), skipping the same stitches as in the previous row using chain arches with the same number of chains.
Continue working according to the chart, following the principles explained above.
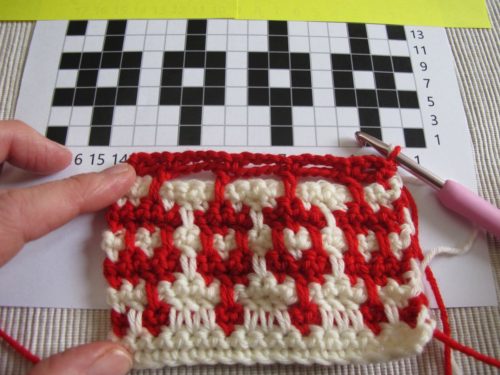
To finish my swatch, I worked two rows in cream, keeping in mind to work dc’s on the first of these rows when I came across chain arches over skipped stitches three rows below.
Once you start, it’s hard to stop!
See you soon!
Thank you for the explanation! Very clear with the text and photos. I’ve bought yarn for a project, now I’m ready to start.
Wonderful! Let us know how it’s going!