Back to basics: the classic starting chain
It’s time to get back to basics – adding my two cents from time to time, of course. Please feel free to share these tutorials with people around you who could be interested in the fundamentals of crochet. I’m sure we can all find a detail or two that we hadn’t thought of before!
Let’s start this series with the very foundation: the classic starting chain, the beginning of any crochet project.
The starting chain is made up of chain stitches. These stitches are not only used to start a project – they can play many roles in stitch patterns and motifs. But right now, let’s concentrate on their role in the starting chain.
I really think that the best way to learn to crochet is in person, being taught by someone. However, I have made a couple of short videos showing the very first steps. They are based on my experience acquired during more than a decade of teaching crochet classes to beginners and more advanced students.
The slip knot, and how to adjust it on your hook:
Working your first chain:
Once you have made your chain, it is important to take a look at it to understand its anatomy. This will be very helpful when you insert your hook in your starting chain to work the first row.
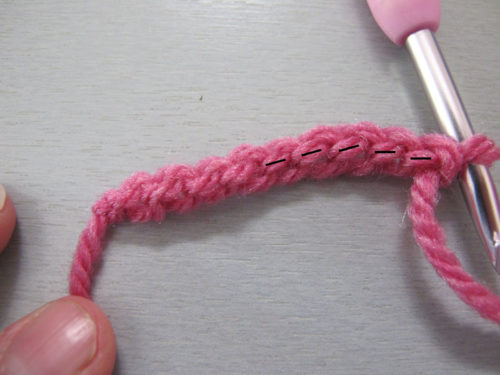
The starting chain has a right side and a wrong side. On the right side, the stitches form V-shapes. Each V is a stitch. The loop on your hook is not a stitch, and neither is the slip knot.
It’s important to keep the right side of the chain facing you all the time while working it. If you turn it, the next stitch will interrupt the chain of V’s, and it will be much more complicated to use the chain as the foundation of your work.
When you turn the chain to the wrong side, you will see a string of bumps, one for each chain stitch. This means that each stitch is made up of three strands: the two strands forming the V on the right side, and the third strand forming the bump on the wrong side.
This is important, not only to impress your entourage but also to understand the different ways you can insert your hook in the starting chain to work new stitches.
In this example, I’m going to work
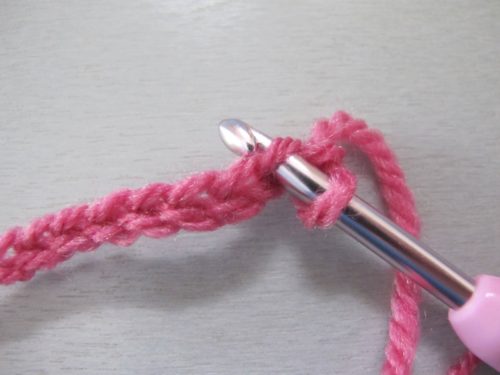
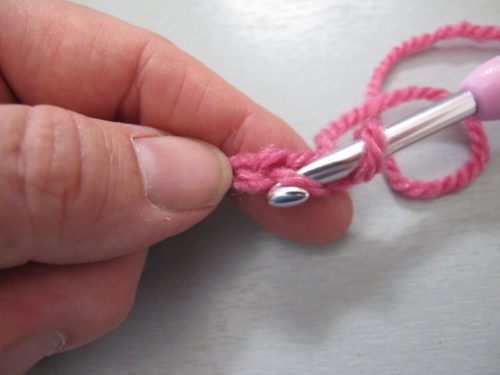
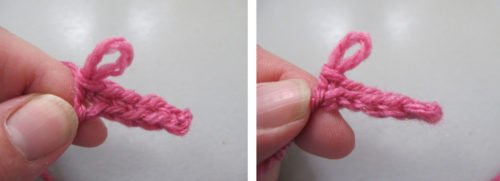
Here, I have inserted my hook under the upper strand of the V seen at the right side of the chain. It’s often the easiest way to do it. There is only one strand on my hook.
Let’s see how to insert the hook in another way. Here, it’s pointing down so it goes under both the upper strand of the V and the bump at the back of the stitch.
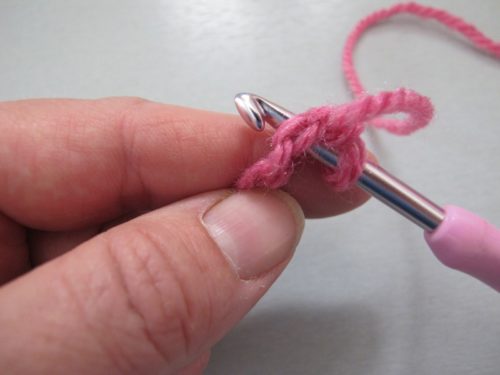
When tilting the chain towards me, it’s clearly visible that my hook goes under two strands.
So what difference does it make to do it one way or the other?
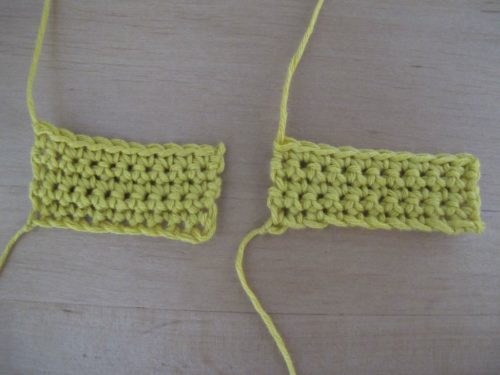
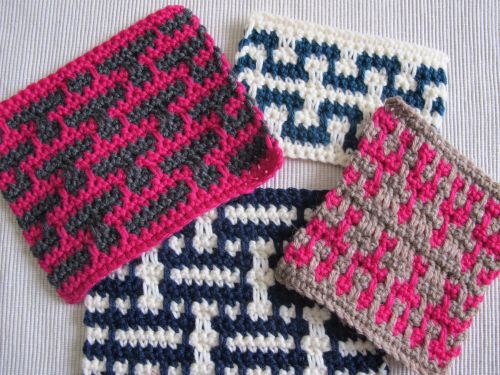
Depending on the yarn used and the way you crochet, if you insert your hook under only one strand in each stitch, you may obtain holes at the base of your first row, as seen in the swatch to the left above. If this is the case, try inserting your hook under the bump at the back as well, so that the stitches in the first row sit closer to the starting chain, as in the swatch to the right.
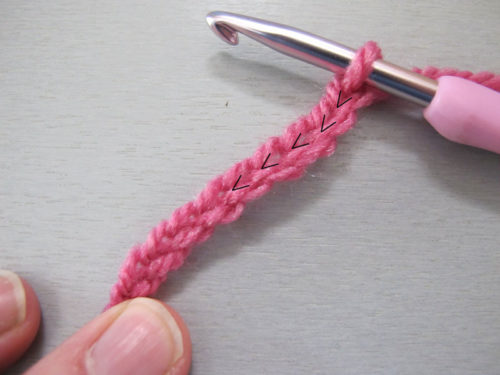
There is a third way to insert your hook in the starting chain – using only the bump at the back of each stitch
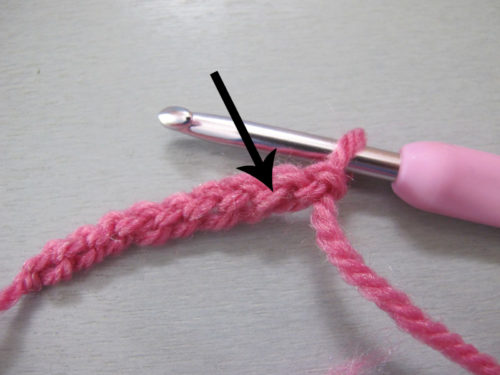
Still working in sc, I skip the first stitch and insert my hook under the bump in the second stitch from the hook, shown by the arrow in the photo above
This is a bit harder to do. To make it a little easier, it’s important to work your starting chain loosely.
The reward for your efforts is a lovely finish, where the lower edge of your work is a neat line of V’s, very similar to the top of the last row.
If you prefer a video, here it is:
Of course, all that is said here about inserting your hook in the stitches of the starting chain applies only to projects worked back and forth. When working in the round, as for a granny square or a doily, the starting chain is joined into a ring and the stitches in the first round are worked around the starting chain without inserting the hook in the stitches. This is why you can work a larger number of stitches in the first round than the number of stitches in the starting chain.
Next time, we will have a look at a couple of alternatives to the classic starting chain!
And you, how do you handle your starting chain? Feel free to share your experiences, your ideas and your questions in the comments below.
See you soon!