
Selvedges with chains
Crochet selvedges – a huge topic!
How do you get straight edges when you work a square or rectangle back and forth?
How do you obtain a neat selvedge?
We are going to discuss these and other topics – starting this time with selvedges worked using chains.
In my examples I will use solid dc’s – the methods should, of course, be adapted to the first stitch in each row of your stitch pattern.
Before starting a row (or a round) in crochet, you must, in one way or another, create a “ladder” so that your hook sits at the same level as the top of the first stitch in the row.
Here, we can’t start making a dc right away. We need to find a way to elevate the hook to the same height as the next row, or the first stitch will be completely squashed.
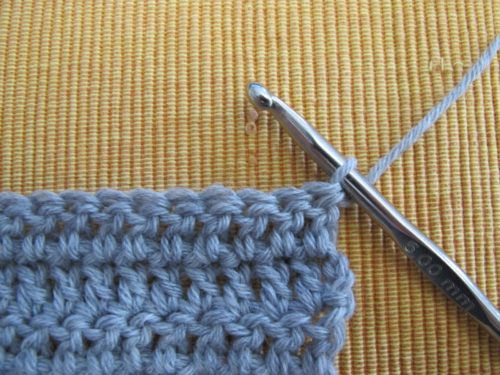
Let’s start with the classic way: ch 3 (count as a dc).
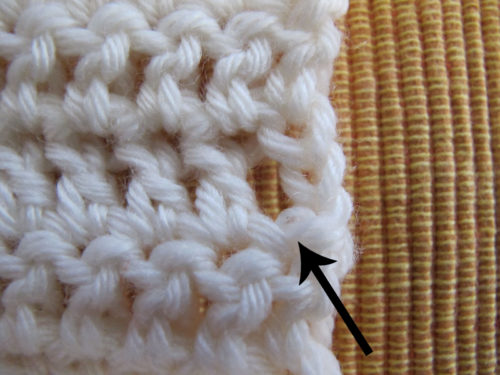
I have chained 3, which I will count as a dc, which means that these 3 ch will replace the first dc in the row. The first “real” dc will be made by inserting the hook in the second stitch in the previous row (at the arrow). It will be the second stitch in the new row.
For an hdc, I’d ch 2; for a tr I’d ch 4; for a double tr I’d ch 5; and so on.
This is the “classic” method, still used in many crochet patterns. In my opinion, it suffers from several drawbacks.
First of all, this method creates a series of holes at the selvedge, at the start of each row.
The 3 ch that count as a dc are not a real dc. The small chain is not as plump as a real dc. Also, the chain starts at the side of the last dc in the previous row, and not at its top (at the arrow), which further underlines the difference between this “stitch” and the other stitches in the row and contributes to the creation of holes.
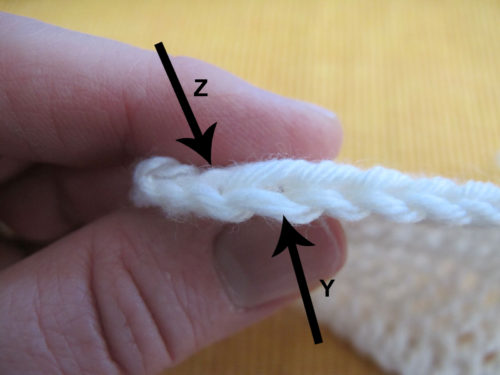
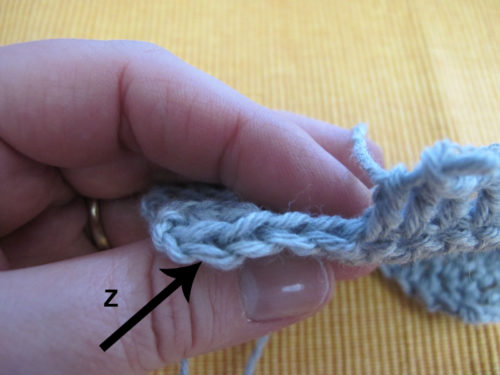
What’s more, this method makes it difficult to identify the last stitch in the previous row. It is easy to see the top of the last real dc (Y), but the last stitch is actually to be made in the 3rd ch at the beginning of the previous row (Z).
To work the last stitch, you need to insert your hook from the back of the 3rd chain. It’s not very easy, especially when you are a beginner.
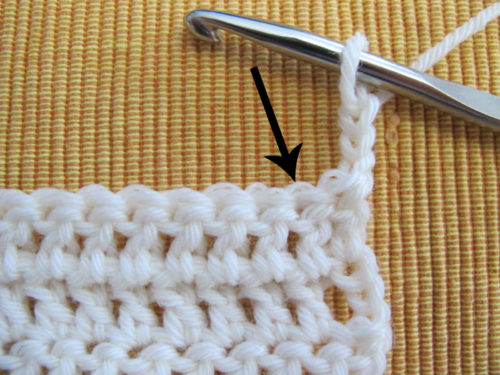
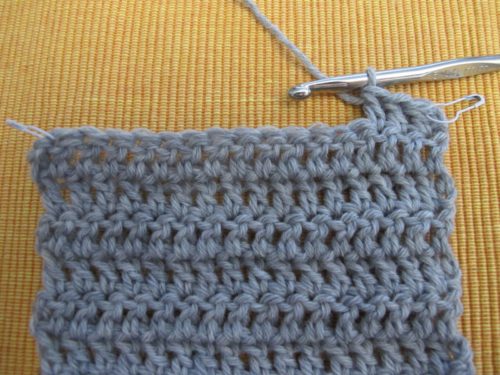
There is another way to start your row using chains: ch 2 (do not count as a st).
These are the 2 ch that start the row. They are there only as a “ladder” for the hook, to rise to the height of the first stitch in the row. The first stitch will be a real dc, made in the last stitch in the row below (at the arrow).

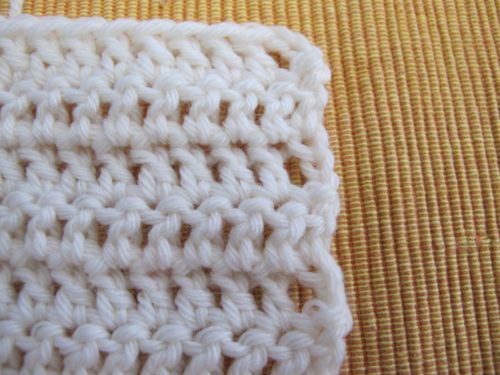
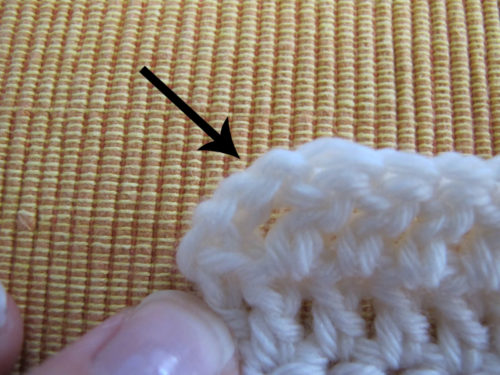
Using this method, you will have an extra layer of stitches at the beginning of each row, forming a scalloped or “wavy” edge:
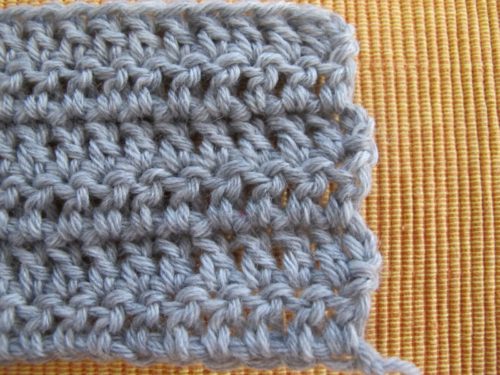
These “waves” will be less noticeable in a lightweight yarn, but will always be there. Personally, I think they are less hard on the eye than the holes created with the previous method. They are also easy to conceal in a border or a seam.
At the end of the row, the last stitch (Z) is easy to find and looks like the other stitches.
In general, I prefer the 2 ch that do not count as a stitch. However, I recommend using the first method in the following two situations:
- In classic motifs worked in the round – the extra 2 ch are impossible to conceal and they distort the motif.
- When working on a filet base (as in the designs Cirkel and Euphorbia) – the selvedge will be much neater when replacing the first dc with 3 ch.
Whichever method you choose, you might need some extra help to keep your selvedge straight! I have met several seasoned crocheters who have difficulties with this, and if you are a beginner, this is very often an issue.
The key to straight selvedges is to clearly identify the first stitch in the row, which will later become the last stitch in the previous row. Rectangles morphing into trapezoids are very often the consequence of the crocheter’s being uncertain about which stitches are the selvedge stitches (=the first and last stitch in the row).
To clearly identify your selvedges, I recommend preparing for it when you make the first stitch in a row.
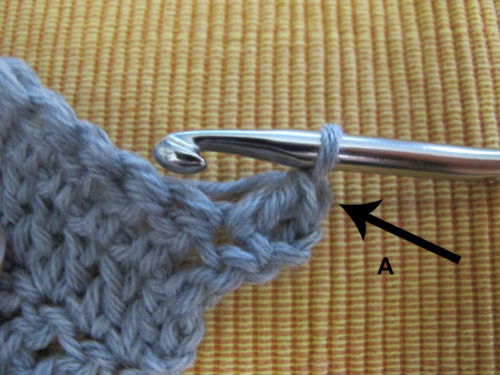
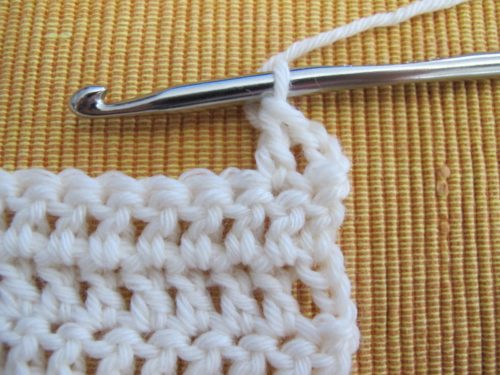
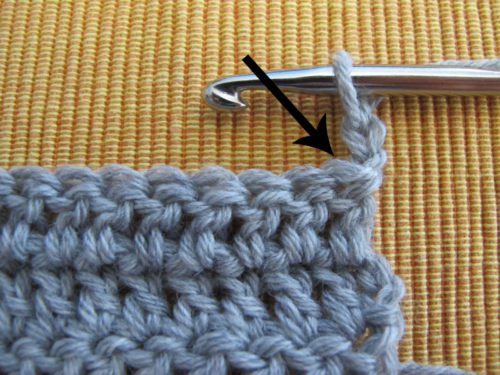
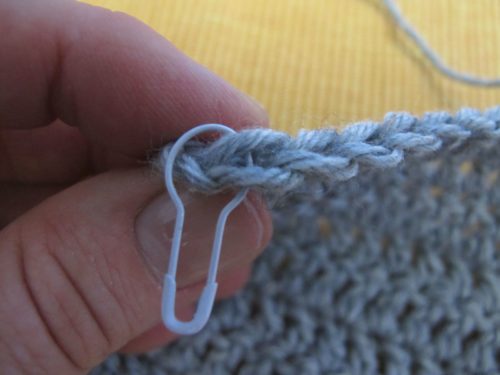
Here, I have just made the first stitch in the row (using the 2-ch method). The top of the stitch just made (A) looks like a V just behind the hook.
Put a marker (of the safety pin type) in this stitch.
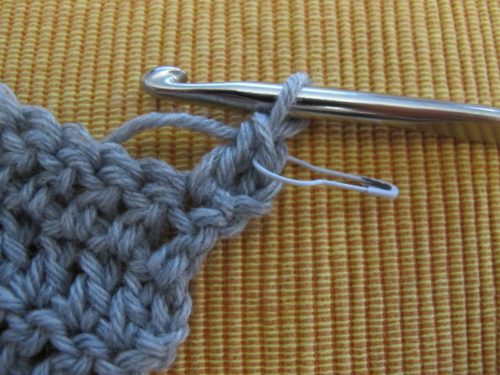
Repeat at the beginning of the following row. Now the selvedge stitches are identified at both sides of the work.
At the end of the second row, there is no hesitation – the last stitch is the marked stitch. I remove my marker, work the last stitch, turn and (using the method of my choice) work the first stitch in the next row, replacing the marker in this new stitch.
Taking the time to remove and replace the marker to move it up row by row helps tremendously to obtain a straight selvedge. Please feel free to use this method as long as you have the slightest hesitation about identifying your selvedge stitches!
There are other methods for your selvedges, not using chains – let’s discuss them next time!
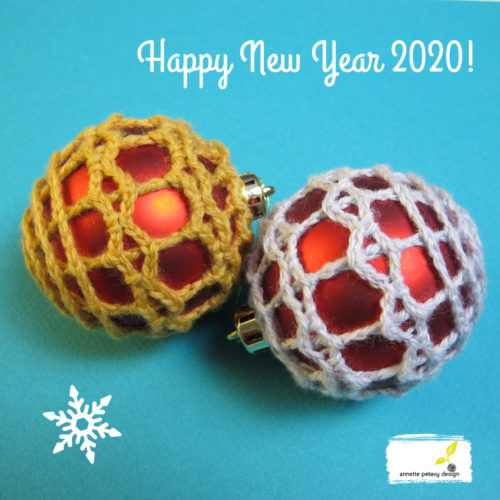
Happy New Year 2020!
In the 2019 newsletters, I explored mosaic crochet in many ways. Since September, the theme (which will continue in 2020) is crochet fundamentals. Here is the recap of all 2019 newsletters (before this one), with links:
- January: Mosaic crochet 1: introduction and first steps in flat mosaic crochet
- February/March: Stitch patterns for mosaic crochet: sources and design
- April: Mosaic crochet in the round: basic principles
- May: Mosaic crochet in the round/One-row mosaic crochet: reading charts
- June: Mosaic crochet or sc stripes – how to close your rounds
- July/August: Mosaic crochet: fixing a mistake
- September: Back to basics: the starting chain
- October: Starting without a chain: foundation stitches
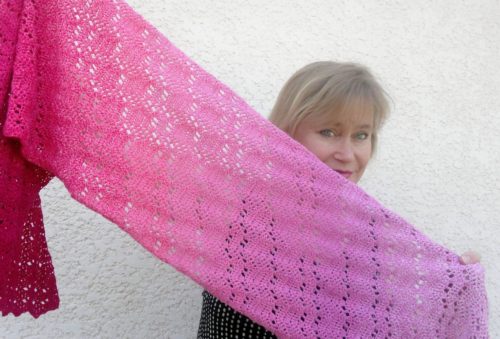
Just one original design of my own published this year, but one that was very popular: Marie-Galante.
2019 was the year when I got serious about videos! My YouTube channel in English is still a modest endeavour, but I will keep working on it in 2020. I love this way of staying in touch!
So, what are my projects, ideas and dreams for 2020?
Passing on knowledge, ideas and skills – I will teach even more in-person classes in 2020, and perhaps take some of them online.
I want to continue working on mosaic crochet, but also on motifs and on exploring different shapes. I will also take the mosaic route with my knitting, explore mixing of yarns and create designs, navigating between accessories and garments.
How about you? What inspires you and makes you excited for 2020?
I wish you a very happy, creative 2020!
See you soon!
