
In the shop
I’m starting this year with a bit of knitting – here is my new shawl design, Guinguette!
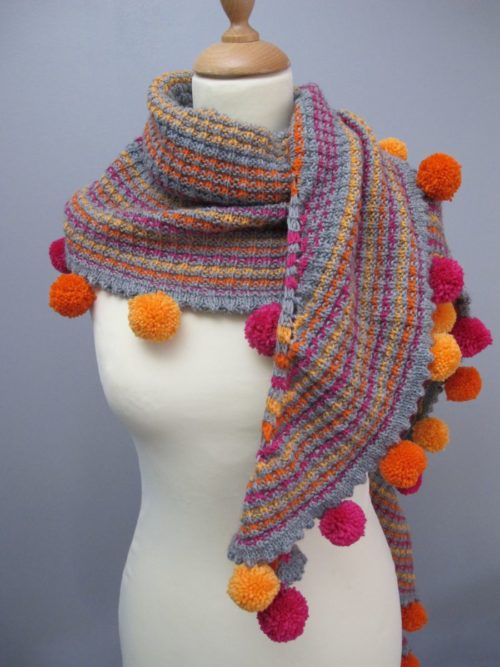
Guinguette is a crescent-shaped shawl. The textured stitch pattern is easy to work, and the coloured stripes add fun and interest. The border is finished with colourful pompoms, reminiscent of the string lights adorning traditional French taverns, “guinguettes”.
Click here to find the pattern in my shop.
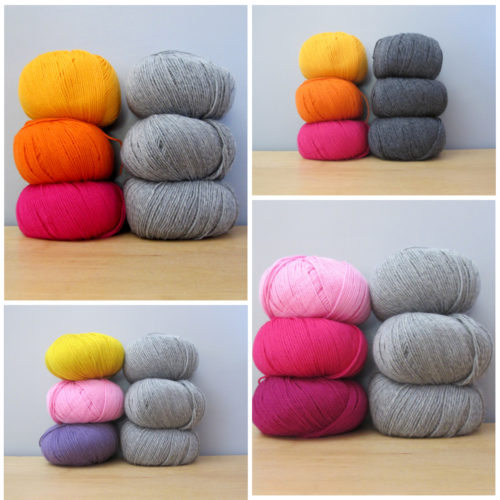
Guinguette is worked in my soft and colourful fingering weight merino. I have 5 different kits lined up for you to make Guinguette. For a more detailed presentation of the different kit options, please refer to this blog post.
In short
Podcast
Tutorial: Selvedges with “mock stitches”
Let’s continue exploring crochet selvedges. I had planned for two newsletters on this topic, but there is so much to say, there will be three!
This is the second one. You can find the first via this link.
A bonus!
There is always something new to learn. While continuing my research on the topic of selvedges, I came upon an excellent idea for improving on one of the techniques shown in the December newsletter!
This came via the fantastic Tuula Maaria and her YouTube channel filled with ideas on crochet and knitting.
It’s a further development of the method of “ch 2, do not count as a stitch”.
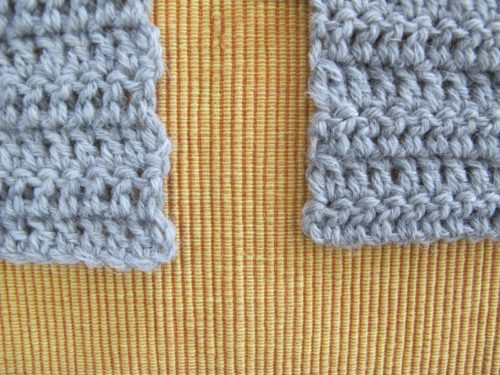
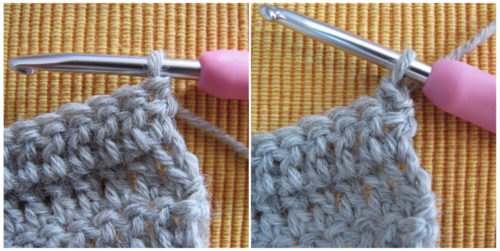
To the left, you can see the technique as explained in my previous newsletter, and to the right, the technique refined by Tuula Maaria, resulting in a really smooth selvedge!
Here’s how you do it:
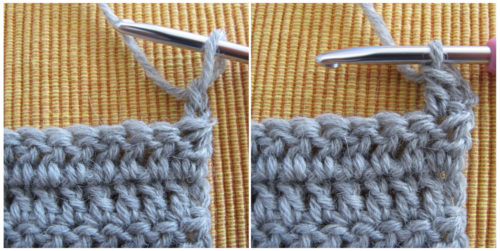
At the start of the row, it’s exactly as before: ch 2 (do not count as a st), 1 dc in the first stitch.
But the end of the row is different:

In the last stitch of the row, instead of a single dc, we are going to work a dc2tog.
For those who need it, a small reminder of how to do this:
Yo, insert the hook in the last st in the row, yo and pull up a loop – there are 3 loops on the hook.
Yo, pull through 2 loops – there are 2 loops on the hook.
Yo, insert the hook in the same st, pull up a loop – there are 4 loops on the hook.
Yo, pull through 2 loops – there are 3 loops on the hook.
Yo, pull through all 3 loops – the dc2tog is finished.
To sum up the method: at the beginning of the row, ch 2 + 1 dc in first stitch; at the end of the row, dc2tog in last stitch.
The result: very neat selvedges!
If you prefer a video tutorial, here it is:
Selvedges with “mock stitches”
In the previous newsletter, we discussed techniques in which the new row starts with chains. This time, we will have a look at another way of handling selvedges, in which we create a “mock stitch”, closely resembling a dc, at the beginning of the row.
I have found two ways of doing this – let’s first have a look at both methods before comparing the result.
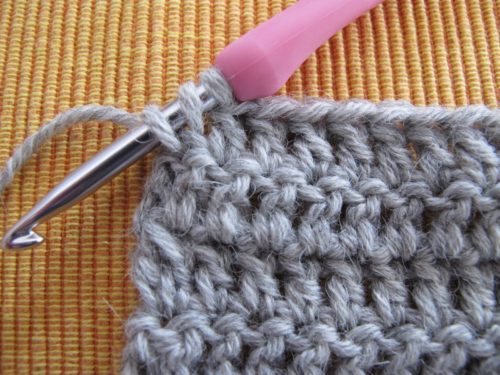
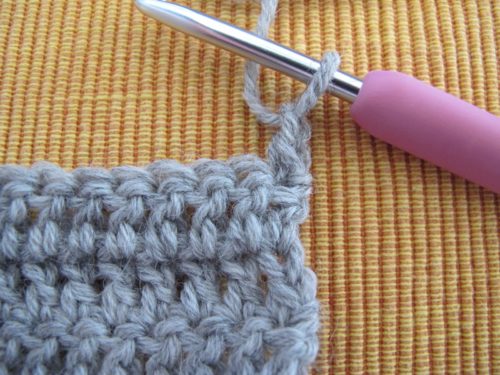
Technique 1: 1 sc + ch 1
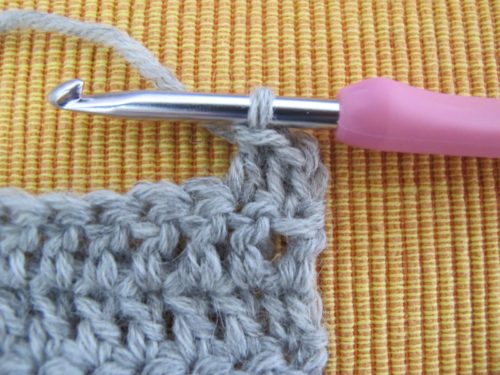
At the beginning of the row, start with a sc (no chain before!) in the first stitch. (The sc in the second photo is small, but it’s there!)
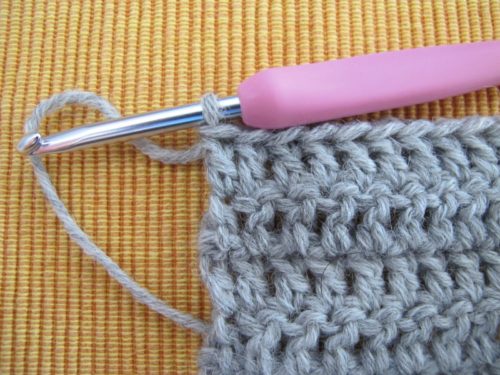
Ch 1 to add height.

1 dc in second stitch. Continue the row.

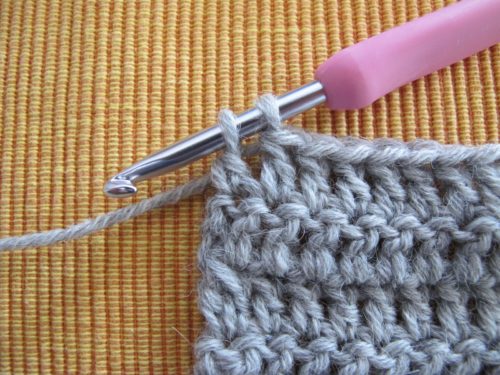
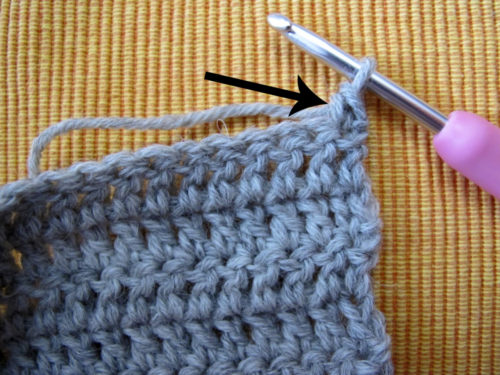
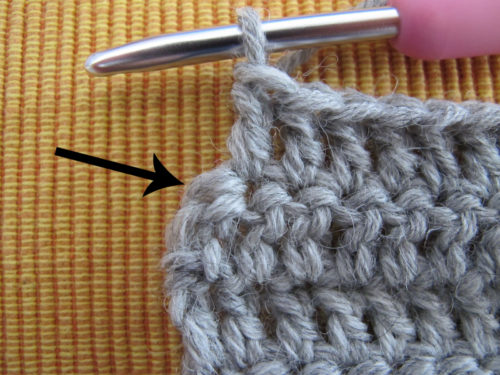
At the end of the row, do not forget to work your last stitch in the ch at the beginning of the previous row (at the arrow).
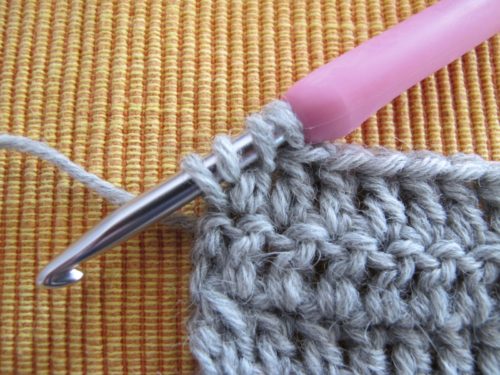
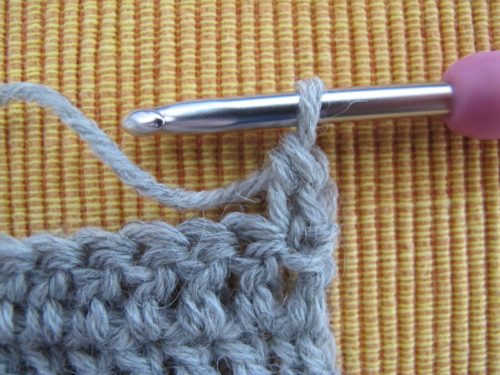
Technique 2 : stacking 2 sc‘s
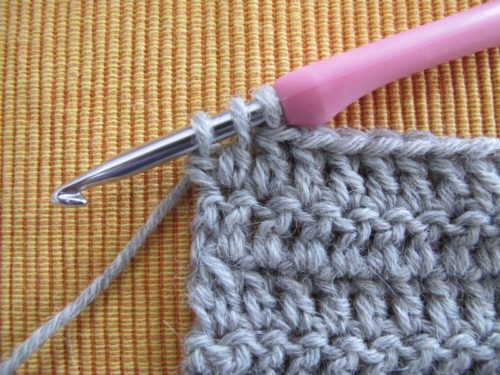
Once again, we start our row directly with a sc. Examine your sc carefully to spot the leftmost vertical strand in the body of the stitch (at the arrow). We are going to make a second sc, inserting the hook under this strand.
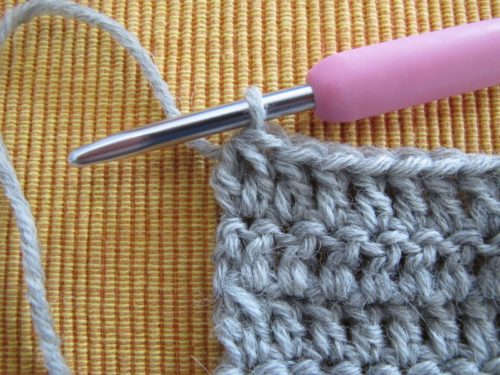
1 dc in second stitch. Continue the row.
At the end of the row, work your last stitch in the second of the “stacked” sc’s at the beginning of the previous row. This stitch looks a lot like the top of a dc, so it’s easy to spot.
Both methods are shown in this video:
Comparing the two
I must admit that I prefer method 2, with the stacked sc’s. I find that it makes the end of the row easier to work. The risk of forgetting the last stitch is diminished since it looks so much like the other stitches in the row. Also, I find it easier to insert my hook in the top of a sc than in the back of a chain stitch. You might very well think differently, and I encourage you to try both ways to form your own opinion!
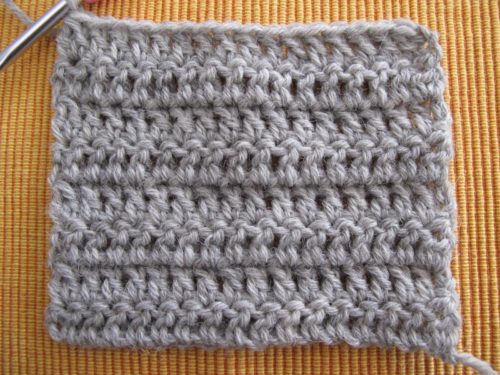
I also wanted to see if there was a visual difference between the two techniques.
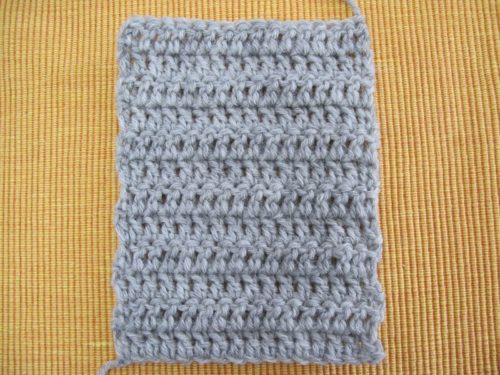
The first 6 rows in this swatch were worked using the first technique (1 sc + ch 1), and the last 6 rows were worked using the second one (stacking 2 sc’s). In both cases, the selvedges are smooth and nice, but I find that the stacked sc’s make for even neater selvedges!
So, which technique should you choose?
I really think that you should choose the one that you personally find to be the best compromise between easy execution and a neat selvedge. It is perfectly fine to choose a method that might not give a perfect result visually if that’s the one that’s the most convenient for you.
Next time, yet another way to handle the selvedge question!
See you soon!

Nice, Annette. Thank you!
Wonderful ideas, Annette. Thank you for sharing them with us. I plan to try both 🙂. Best, Padma