
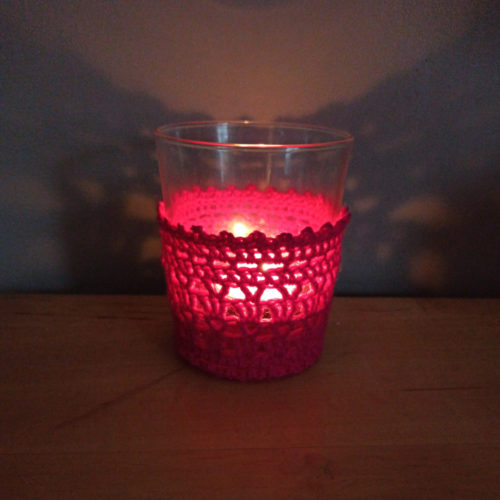
A quick project to light up the winter darkness – a candle holder dressed up in crochet.
If using a real candle, please make sure that the flame does not, under any circumstances, come into contact with the crocheted cover. If in doubt, use a LED candle. We don’t want 2020 to end in a house fire!
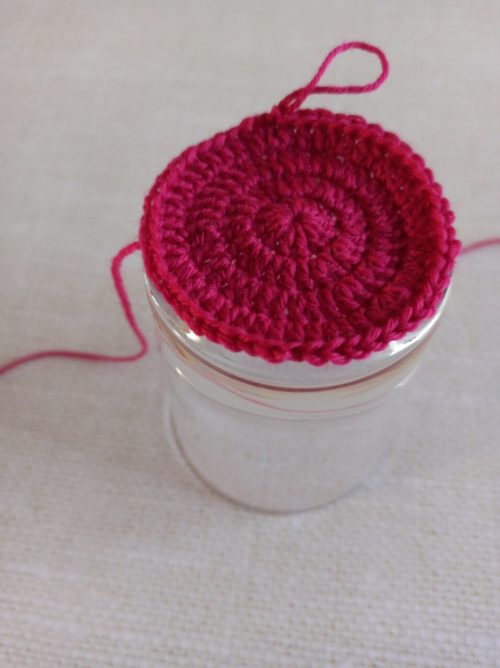
For the candle holder, I used a Godis glass from IKEA (size 8 oz). You could use any glass with a straightish shape, or a small jar.
The Godis glass measures approx 6.5 cm (2.5″) across at the bottom and 8 cm (slightly more than 3″) at the top. It is 9.5 cm (3.75″) high. I give instructions below on how to adapt the bottom of your project to the glass used.
I used my own fingering weight merino yarn (approx 10 – 15 g) and a 2.5 mm (between a US B-1 and C-2) hook.
Stitches used:
ch = chain
sl st = slip stitch
sc = single crochet
dc = double crochet
dc blo = double crochet in the back loop only
tr = treble
This pattern uses US terminology
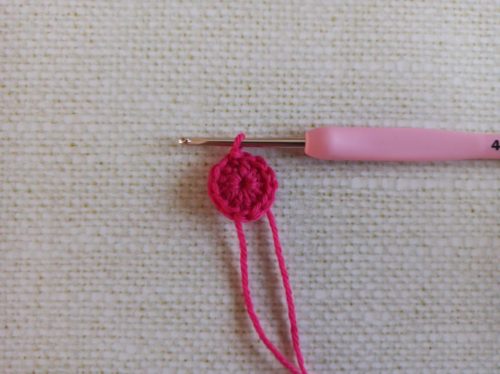
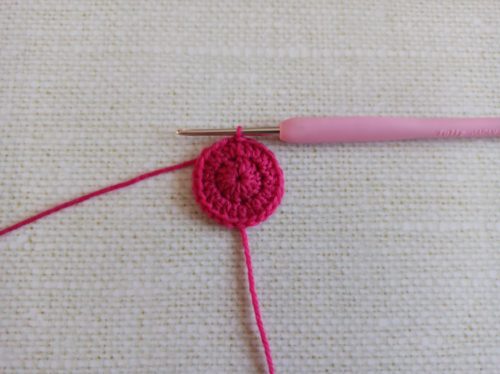
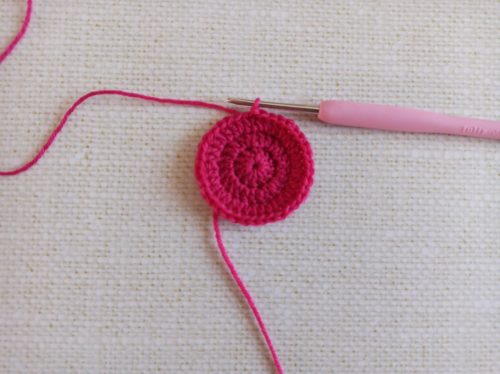
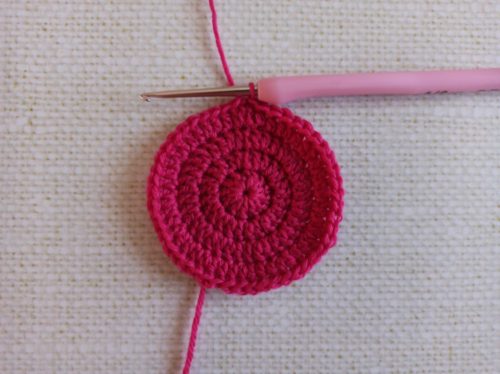
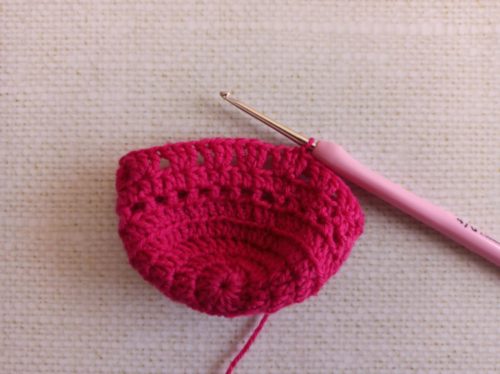
Bottom:
Ch 4, close to a ring with 1 sl st in 4th ch from hook.
NB: All rounds in the bottom close with a sl st in the first dc in the round.
Round 1: Ch 2 (do not count as a st), 12 dc in ring. Close this round, and all rounds of the bottom with a sl st in the first dc in round.
Round 2: Ch 2 (do not count as a st), 2 dc in each dc. There are 24 dc.
Round 3: Ch 2 (do not count as a st), 1 dc in first dc, 2 dc in next dc, * 1 dc in next dc, 2 dc in next dc; repeat from * to end of round. There are 36 dc. [1 st between increases]
Round 4: Ch 2 (do not count as a st), 2 dc in first dc, 1 dc in each of next 2 dc, * 2 dc in next dc, 1 dc in each of next 2 dc; repeat from * to end of round. There are 48 dc. [2 sts between increases]
Measure the bottom by placing it on the bottom of the glass or jar used. If your bottom is about the same size, it’s perfect. It shouldn’t be significantly larger or smaller. If needed, you can remove or add a round of dc, or adjust the height of the stitches in the last round (using hdc or tr). The number of stitches in the last round must be a multiple of 6.
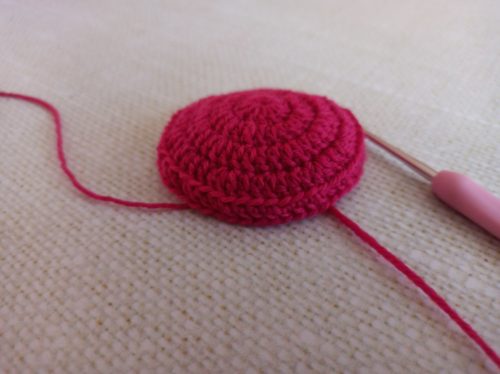
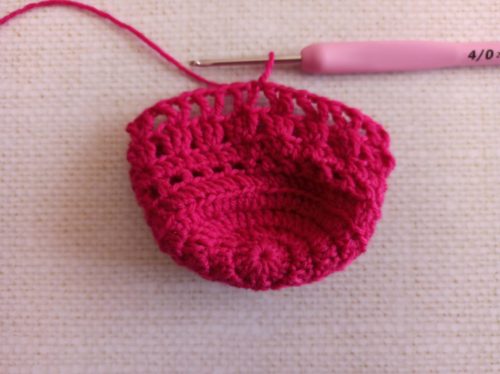
Sides:
From this point on, we are going to continue working in the round, without increases, to create a tube which will be the visible part of our crochet-covered candle holder. Depending on the size of your glass and the gauge of previous rounds, the first round of this tube might straddle the edge of the bottom, or even end up under the glass.
Round 1: Ch 2 (do not count as a st), 1 dc blo in each st. Close the round with a sl st in the first dc blo in round.
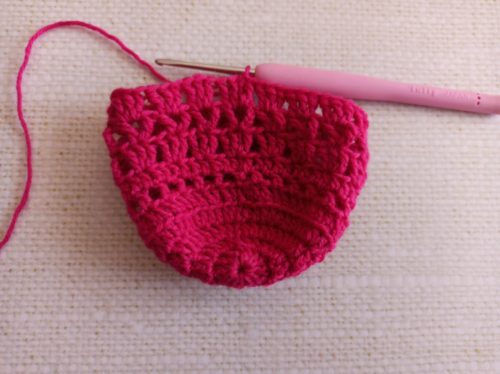
Round 2: Ch 4 (count as 1 dc + 1 ch), skip first and second dc, 1 dc in next dc, * ch 1, skip 1 st, 1 dc in next dc; repeat from * until 1 st remains at the end of round, ch 1. Close the round with a sl st in the 3rd ch at the beg of round.
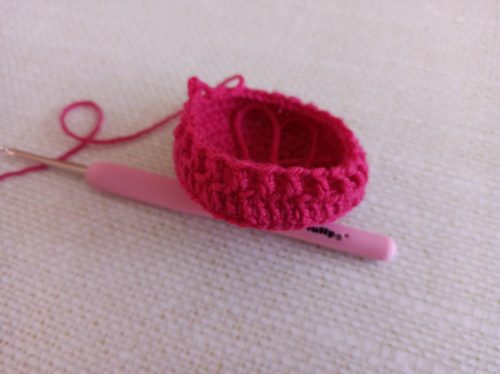
Round 3: Ch 2 (do not count as a st), 1 dc in the 3rd ch at the beg of previous round (the same st as the one where you made the sl st to close the previous round), 1 dc in ch-1 sp, * 1 dc in next dc, 1 dc in next ch-1 sp; repeat from * to end of round. Close the round with a sl st in first dc in round.

Round 4: Ch 3 (do not count as a st), 2 tr in first st in previous round (the same st as the one where you made the sl st to close the previous round), * skip 2 sts, 3 tr in next st; repeat from * until 2 sts remain at end of round, 1 tr in first dc in previous round. Close the round with a sl st in first tr in round.
Round 5: Ch 5 (count as 1 tr + 1 ch), 1 tr in first st in previous round (the same st as the one where you made the sl st to close the previous round), * skip 2 sts, [1 tr, ch 1, 1 tr] in next st; repeat from * until 2 sts remain at end of round. Close the round with a sl st in 4th ch at the beg of round.
Round 6: 1 sl st in first ch-1 sp, ch 3 (do not count as a st), 2 tr in same ch sp, 3 tr in each ch sp to end of round, 1 tr in first ch sp. Close the round with a sl st in first tr in round.
Round 7: As round 5

Round 8: Ch 2 (do not count as a st), 1 dc in 4th ch at the beg of previous round (the same st as the one where you made the sl st to close the previous round), 1 dc in 1-ch sp, * 1 dc in each of next 2 sts, 1 dc in next 1-ch sp; repeat from * until 1 st remains at the end of round, 1 dc in last st. Close the round with a sl st in first dc in round.
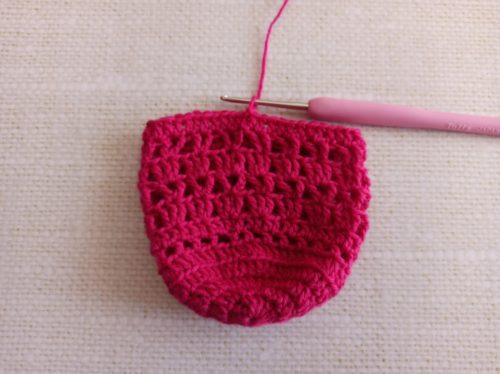
Round 9: As round 2.
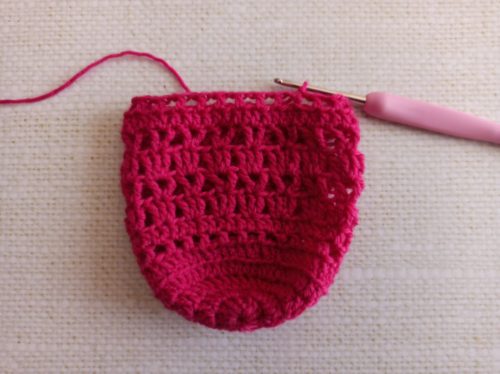
Round 10: As round 3.

Round 11: Ch 1 (do not count as a st), 1 sc in first st in previous round (the same st as the one where you made the sl st to close the previous round), [1 sc, ch 1, 1 sc] in next st, * 1 sc in next st, [1 sc, ch 1, 1 sc] in next st; repeat from * to end of round. Close the round with a sl st in first sc in round.
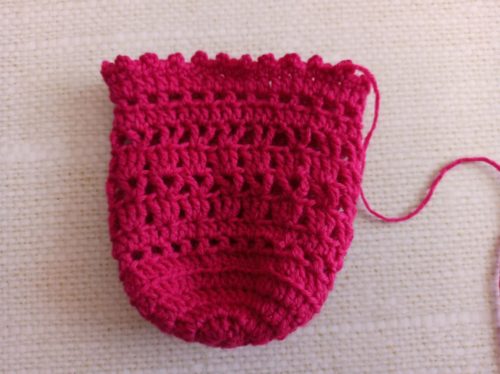
Fasten off. Weave in ends.
So pretty! Merci beaucoup Annette. And thank you for all your kind and helpful tutorials. I wish a happy and healthy new year to you and your family.
Thank you Francesca! I return all your lovely wishes, and hope that we can make 2021 the year when we turn toward the light!