
After my previous tutorial on the basic principles for post stitches, I was asked if this worked also for sc’s. The short answer is “yes”, but I think it’s worth the while to elaborate a little more.
Here are my ideas on sc’s and post stitches, combined in different ways.
WHEN A SINGLE CROCHET IS USED AS THE BASE FOR A POST STITCH
In this situation, it is very important to know how to insert your hook to work around the “post” of this short little stitch!
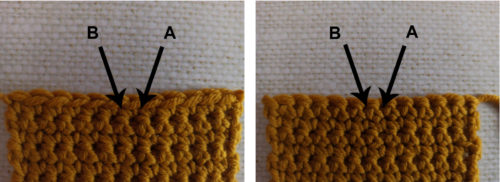
Whichever kind of post stitch you are making (a front post stitch or a back post stitch) the spaces where your hook will go are the same: A and B. To the left, these spaces are shown around a stitch on the right side (as if working in the round), to the left, the stitch is seen from the wrong side (as if working back and forth).
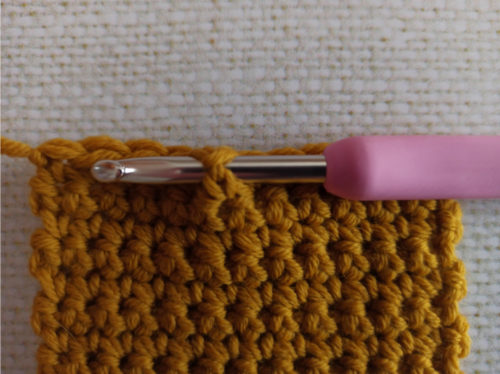
To work a post stitch in a sc, your hook enters just under the top of the stitch (the “V” when seen from above), and exits on the other side of the stitch, just under the top of the next stitch. In the photo above, I illustrate the path of the hook when working a front post stitch around a sc on the right side.
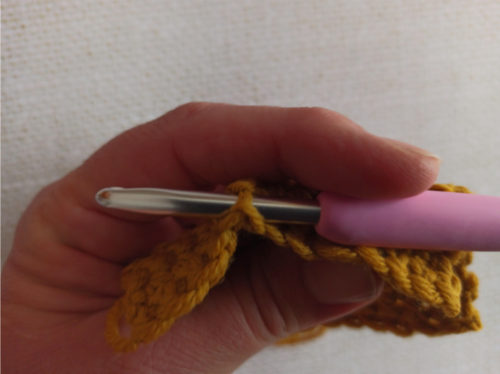
As usual, the picture showing the path of the hook for a back post stitch is less visually compelling, but this is what you will see when tilting the work towards you.
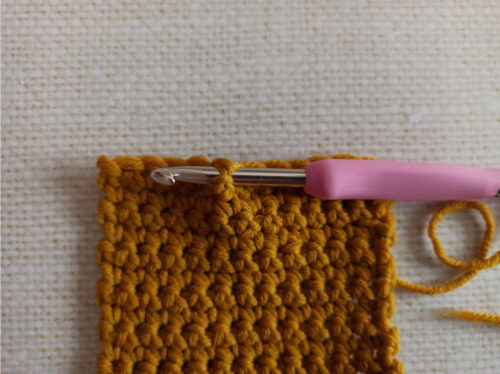
The stitch you work into will, of course, look a little bit different when seen from the wrong side (when working in rows), but the hook still enters and exits the work just under the top of the stitch.
stacked Sc post stitches (fpSC and bpsc)
It is, of course, possible to work sc post stitches in sc post stitches by stacking the stitches on top of each other.
I recently saw this in an amigurumi pattern where the stacked sc post stitches were used to represent the ribbing at the bottom of a hat.
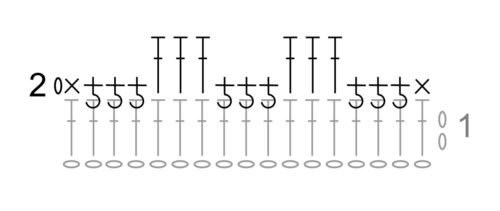
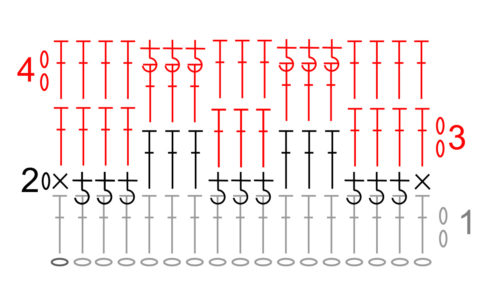
You could make a chart for this stitch pattern as follows:
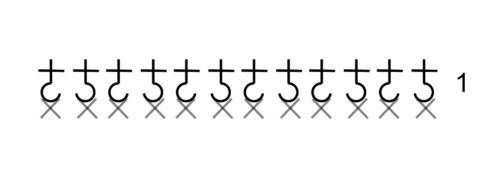
For sc post stitches I prefer using the “+” symbol rather than the “x” symbol, to make the chart easier to read. So, for round 1, 1 FPsc and 1 BPsc are alternated throughout, worked around the sc in the previous round.

On the next round, 1 FPsc is worked in every FPsc and 1 BPsc in every BPsc.
You can repeat round 2 as many times as you want.
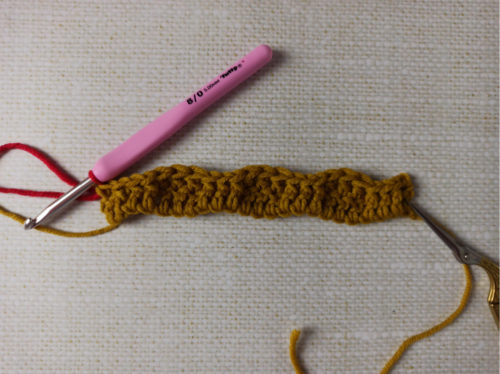
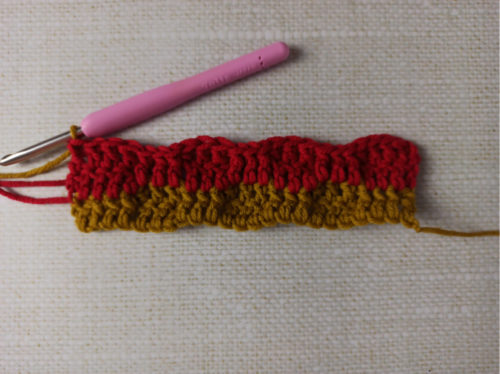
Here is the result:
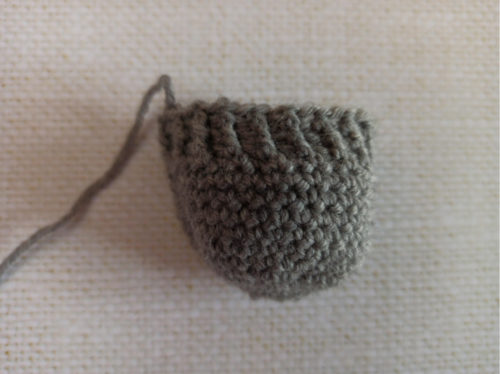
The columns of stacked stitches skew heavily to the left, but it works. I do admit that this is not the most comfortable stitch pattern to crochet. It is necessary to work the stitches loosely so as not to get too compact an end result.
USING POST SC’S TO ADD TEXTURE TO A STITCH PATTERN
Right now this is the idea I’m most interested in when it comes to sc’s and post stitches! Below, I discuss this when working back and forth, but you can, of course, adapt the idea to working in the round.
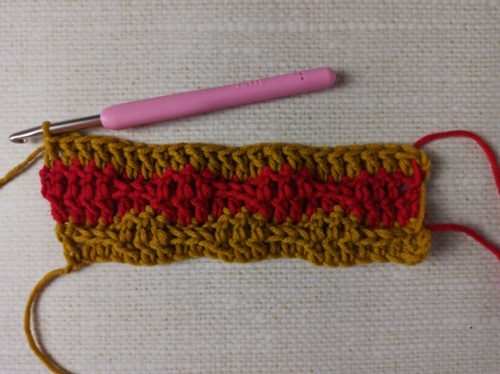
By working FPsc on the “return” row (on the wrong side) around some or all stitches in the row below, the tops of these stitches will tilt to the right side, which creates a very clear texture.
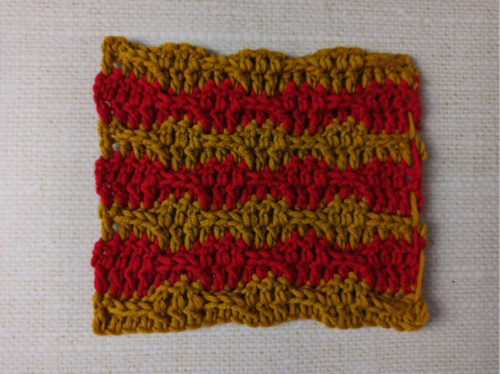
Here I’m going to show an example using a stitch patten found in the book 99 Crochet Post Stitches by Darla Sims. (If you are looking for this stitch pattern in the book, be aware that it’s shown in a single colour and from what I consider to be the wrong side… Also, the book does not include charts. However, despite not-super-interesting photos and written-only instructions, the books by Darla Sims are gold mines of crochet stitch patterns!)
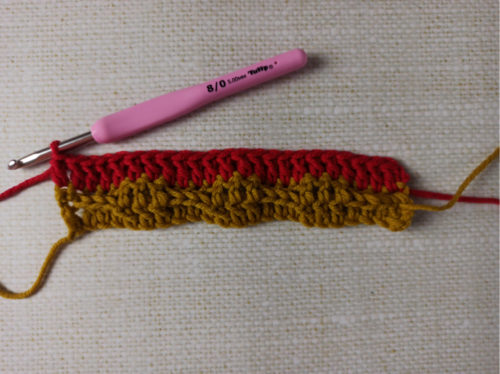
This is a variation of a classic stitch pattern in which groups of sc’s alternate with groups of dc’s. I show the pattern worked in two colours.
Ch a multiple of 6 + 5 (including 2 selvedge stitches).
Turn work at the end of each row.
Row 1 (with col A): Ch 2 (do not count as a st), 1 dc in 3rd ch from hook, 1 dc in each ch to end of row.
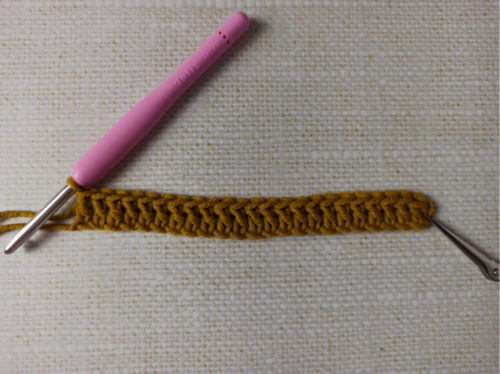
Row 2 : Ch 1 (do not count as a st), 1 sc in first st, * 1 FPsc in each of next 3 sts, 1 dc in each of next 3 stitches; repeat from * to last 4 sts, 1 FPsc in each of next 3 sts, 1 sc in last st. Change to col B in the last step of the last stitch.
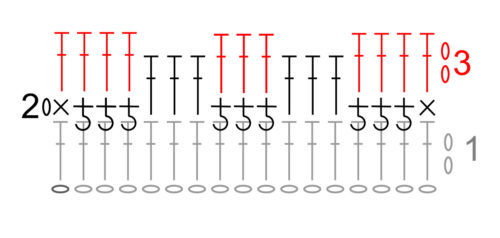
Row 3 (with col B): Ch 2 (do not count as a st), 1 dc in each st to end of row.
Row 4 : Ch 2 (do not count as a st), 1 dc in each of first 4 sts, * 1 FPsc in each of next 3 sts, 1 dc in each of next 3 sts; repeat from * to last st, 1 dc in last st. Change to col A in the last step of the last stitch.
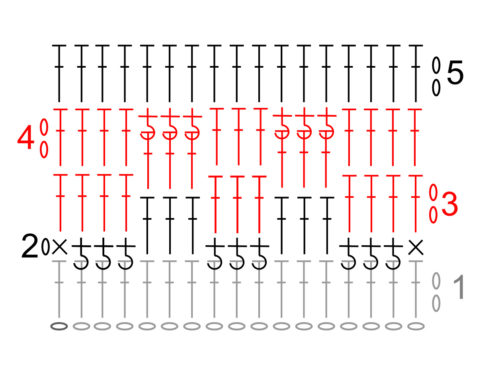
Row 5 (with col A): Ch 2 (do not count as a st), 1 dc in each st to end of row.
Repeat rows 2 – 5.
Have fun testing how a few post sc’s can change your favourite stitch pattern!
As always, please feel free to share your ideas, opinions and questions in the comments below!
See you soon,

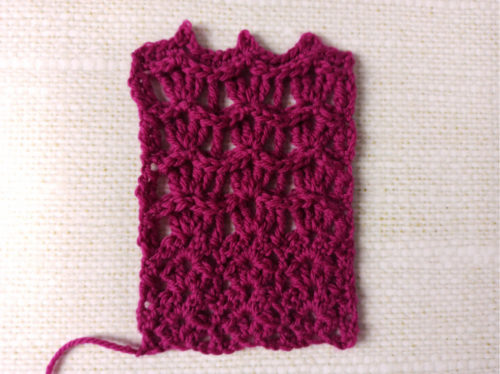
Lena Fedotova on Ravelry has many crochet patterns that use post stitches. Her designs are breathtaking and are a great example of the work you can create after studying your tutorials.
I wholeheartedly agree, she’s a wonderful designer !